Configure Windows Autopilot with Workspace ONE

Step by step guide to configuring Windows Autopilot with Workspace ONE and Microsoft Entra ID
1. Overview
Windows Autopilot is a collection of technologies designed to simplify the deployment and provisioning of new Windows devices. It enables devices to be pre-configured and automatically enrolled into your preferred Unified Endpoint Management (UEM) platform as soon as they are powered on and connected to the internet.
To take advantage of Autopilot, your OEM or hardware reseller should pre-register devices to your Entra ID tenant during the fulfilment process. Be sure to discuss this requirement with your vendor when placing your device orders.
Autopilot is one of several methods available for enrolling Windows devices into Workspace ONE. For a complete list of supported enrolment options, refer to the Omnissa documentation here.
2. Entra ID integration
2.1 Workspace ONE UEM configuration
The first step is to integrate your Workspace ONE UEM environment with Microsoft Entra ID.
- Log in to your Workspace ONE UEM tenant.
- Navigate to Settings > All Settings > System > Enterprise Integration > Directory Services
- Configure the following settings:
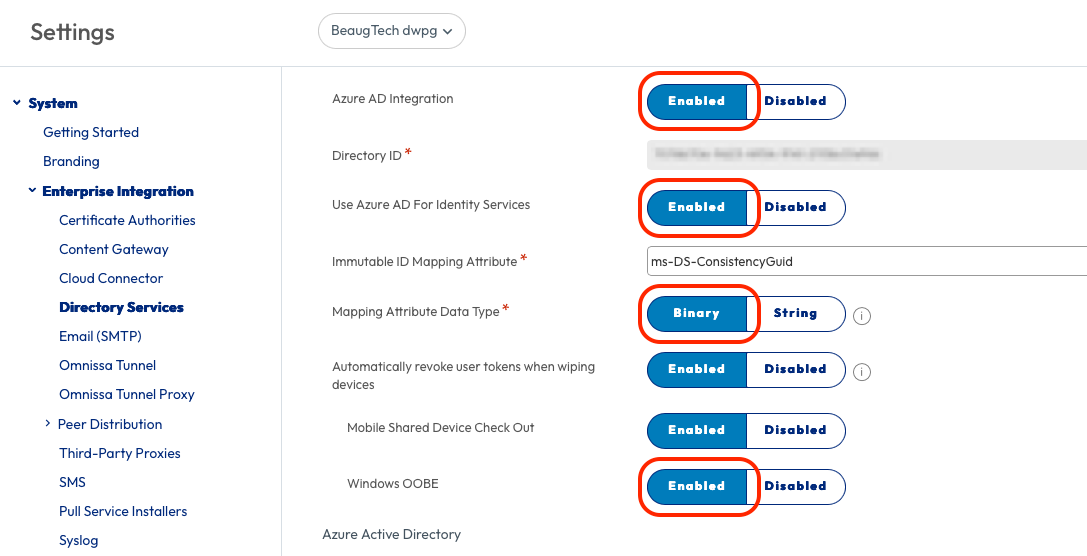
- Azure AD Integration: Enabled
- Directory ID: Your_Entra_ID_Tenant_ID
- Your Tenant ID can be found in the Entra admin centre under Entra ID > Manage > Properties
- Use Azure AD For Identity Services: Enabled
- Immutable ID Mapping Attribute:
ms-DS-ConsistencyGuid - Mapping Attribute Data Type: Binary
- Windows OOBE: Enabled
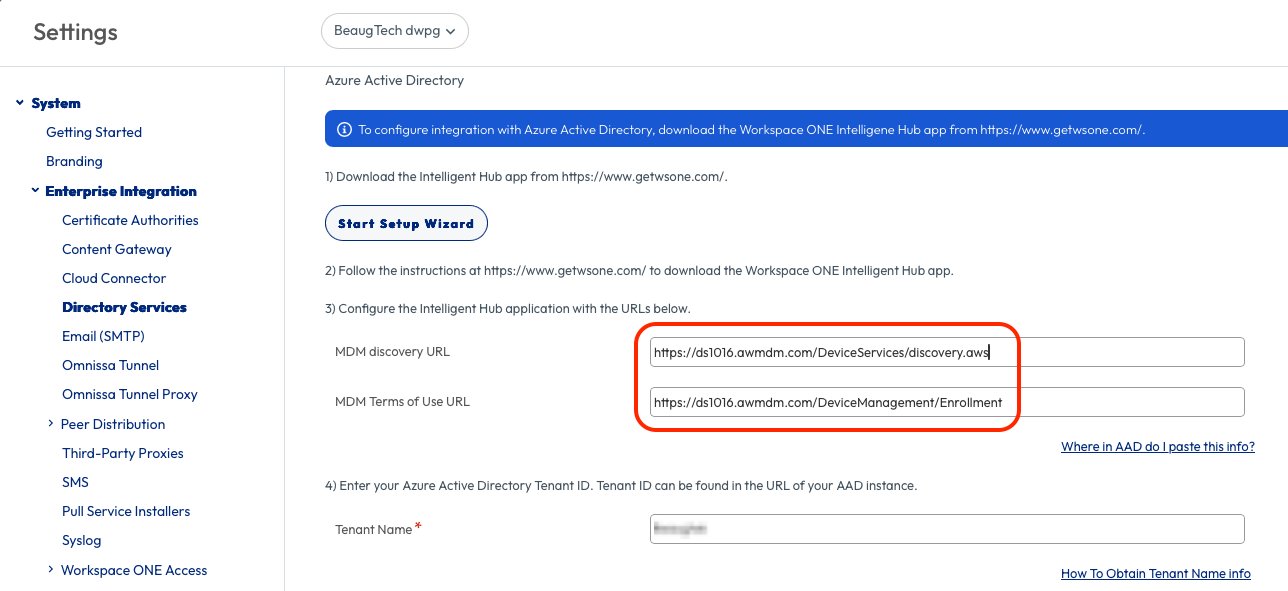
- Under the Azure Active Directory section, copy the MDM Discovery URL and MDM Terms of Use URL.
- These values will be required in the next section.
2.2 MDM authority
Next, configure Workspace ONE as the MDM authority within Microsoft Entra ID.
- Log in to your Entra ID tenant - https://portal.azure.com
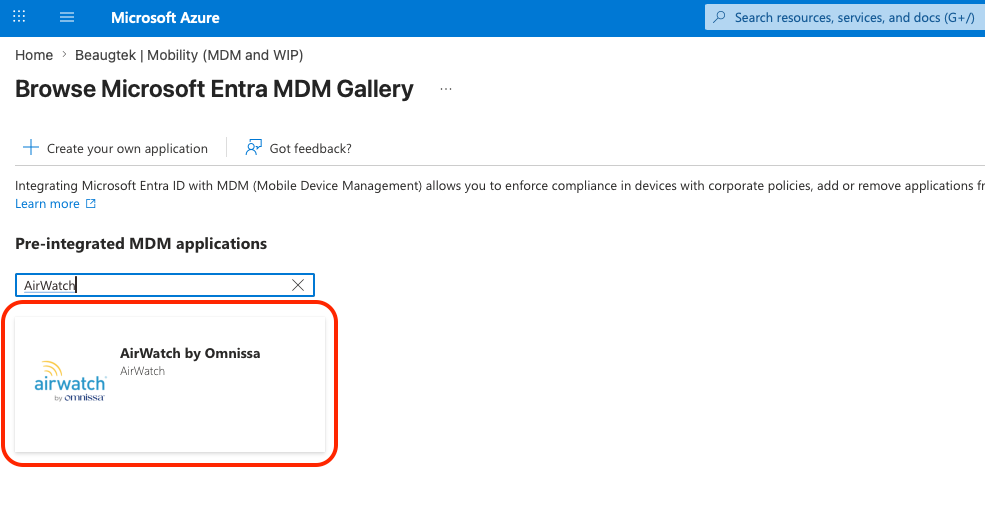
- Navigate to Entra ID > Manage > Mobility (MDM and WIP)
- Click Add application
- Search for AirWatch by Omnissa and click Create
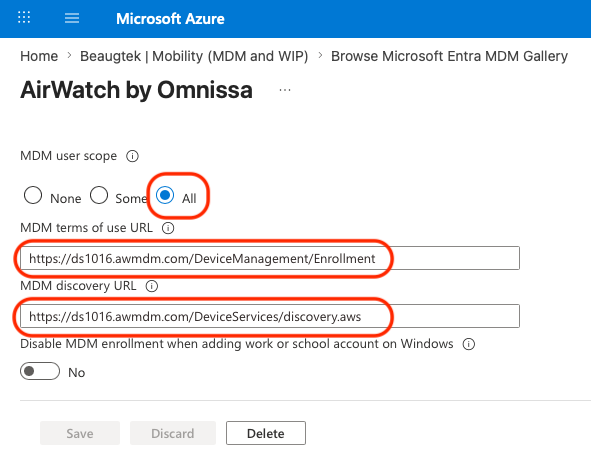
- Configure the following settings:
- MDM User Scope: All
- MDM Discovery URL: Paste the URL copied earlier
- MDM Terms of Use URL: Paste the URL copied earlier
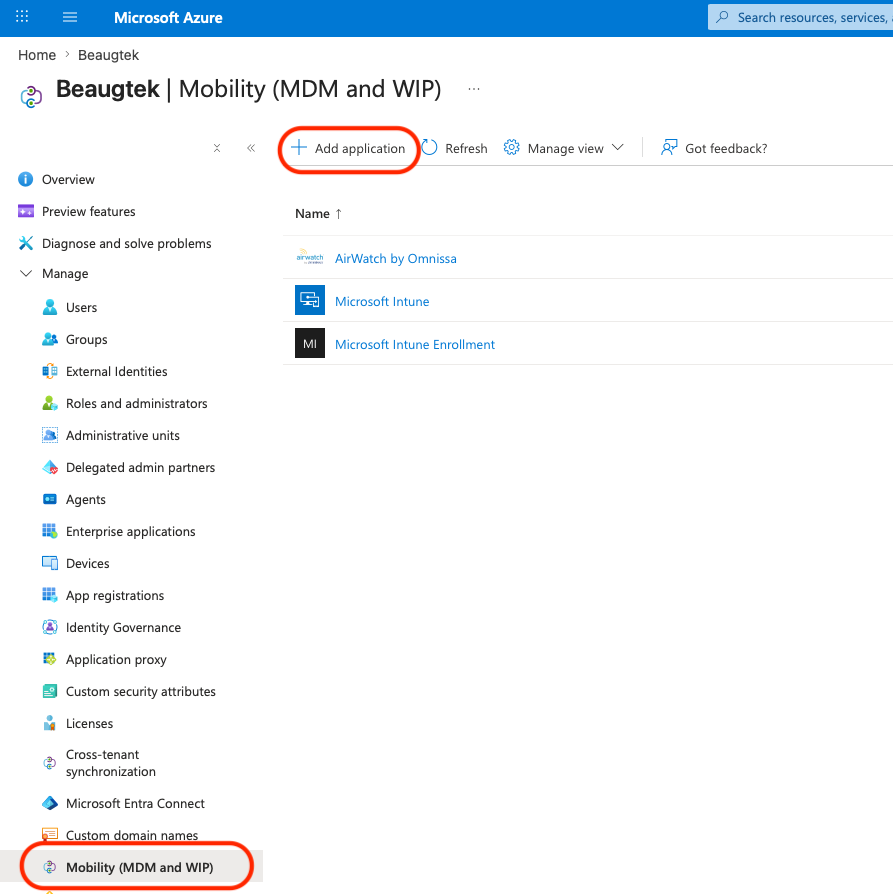
Note: If Microsoft Intune is also configured in your tenant, ensure its MDM User Scope is set to None to prevent enrolment conflicts.
3. Autopilot configuration
3.1 Entra ID device group
Create a dynamic device group to automatically include all Windows Autopilot devices registered in your tenant. This group will later be used to assign the Autopilot deployment profile.
- Log in to your Entra ID tenant - https://portal.azure.com
- Navigate to Entra ID > Manage > Groups
- Create a new group
- Group type: Security
- Group name: All Windows Autopilot devices
- Group description: Security group containing all Windows Autopilot devices
- Microsoft Entra roles can be assigned to the group: No
- Membership type: Dynamic Device
- Rule syntax:
(device.devicePhysicalIDs -any (_ -startsWith "[ZTDid]"))
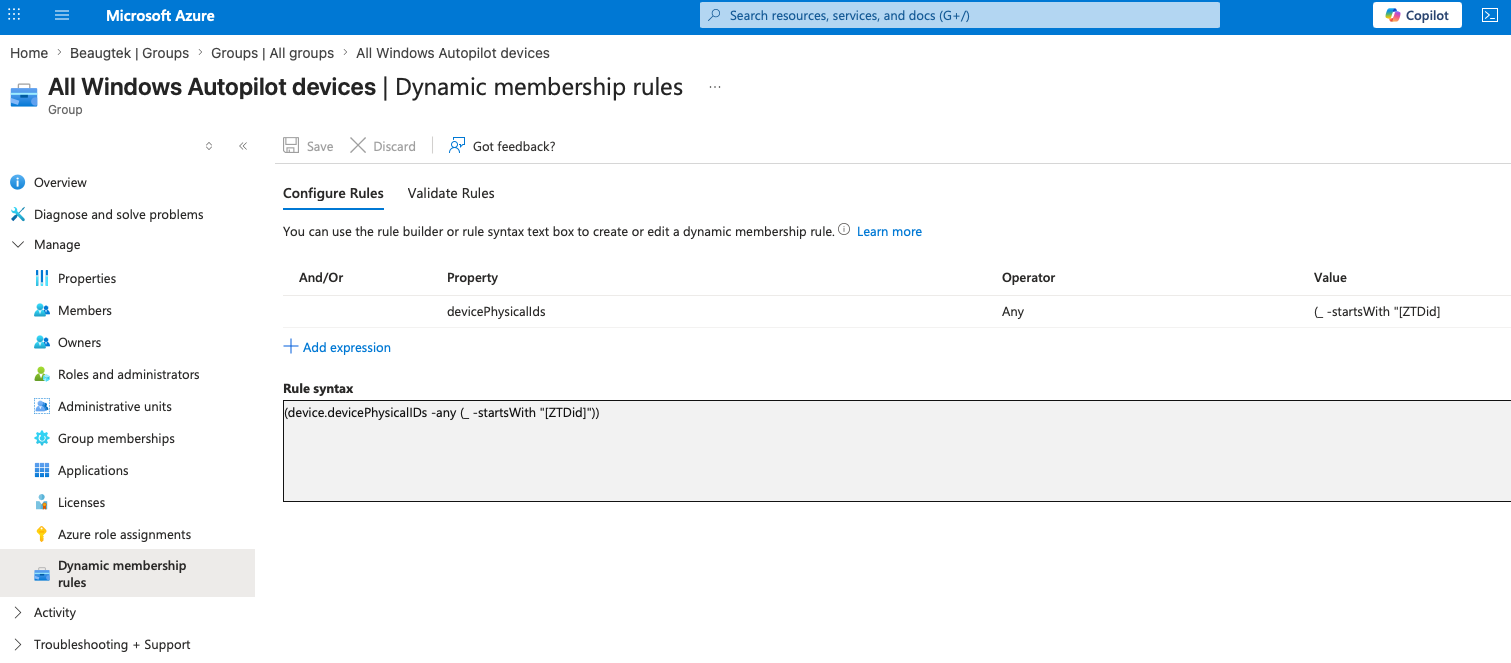
The above rule automatically includes all devices registered with Windows Autopilot.
Note: If you require more granular targeting, Microsoft provides additional examples and guidance for Autopilot dynamic membership rules in their documentation here.
3.2 Autopilot profile
Now it’s time to create and assign the Autopilot deployment profile.
- Log in to your Intune tenant - https://intune.microsoft.com
- Navigate to Devices > Device onboarding > Enrollment > Windows > Windows Autopilot
- Select Deployment profiles
- Click Create profile
- Configure the profile according to your requirements
- Assign the profile to the Entra ID device group created in the previous step
- Configure the profile according to your requirements
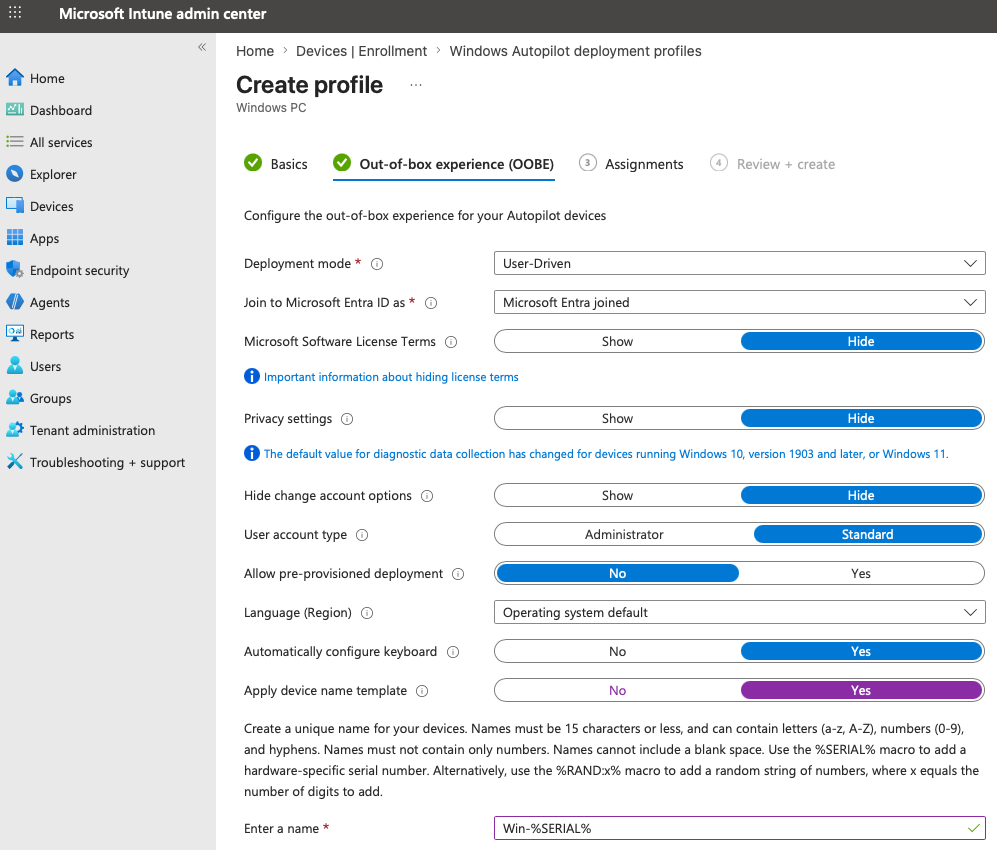
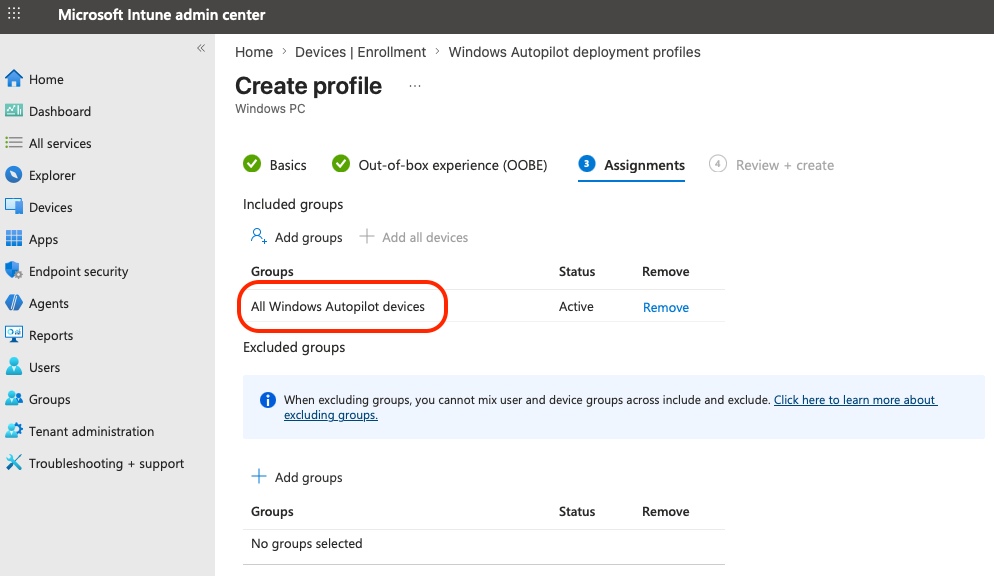
Tip: If you cannot access the Autopilot menus shown above, it is likely because your tenant does not have an Intune license assigned. Microsoft now restricts access to these pages based on licensing. Purchasing a single Microsoft Intune Device Plan 1 license is typically sufficient to unlock the required administration pages.
3.3 Autopilot devices
As devices are registered by your OEM, they will automatically appear in the Windows Autopilot devices list. Because the deployment profile is assigned to the dynamic Entra ID group, newly registered devices will automatically receive the Autopilot configuration without any manual intervention.
To view registered devices:
- Log in to your Intune tenant - https://intune.microsoft.com
- Navigate to Devices > Device onboarding > Enrollment > Windows > Windows Autopilot
- Select Devices
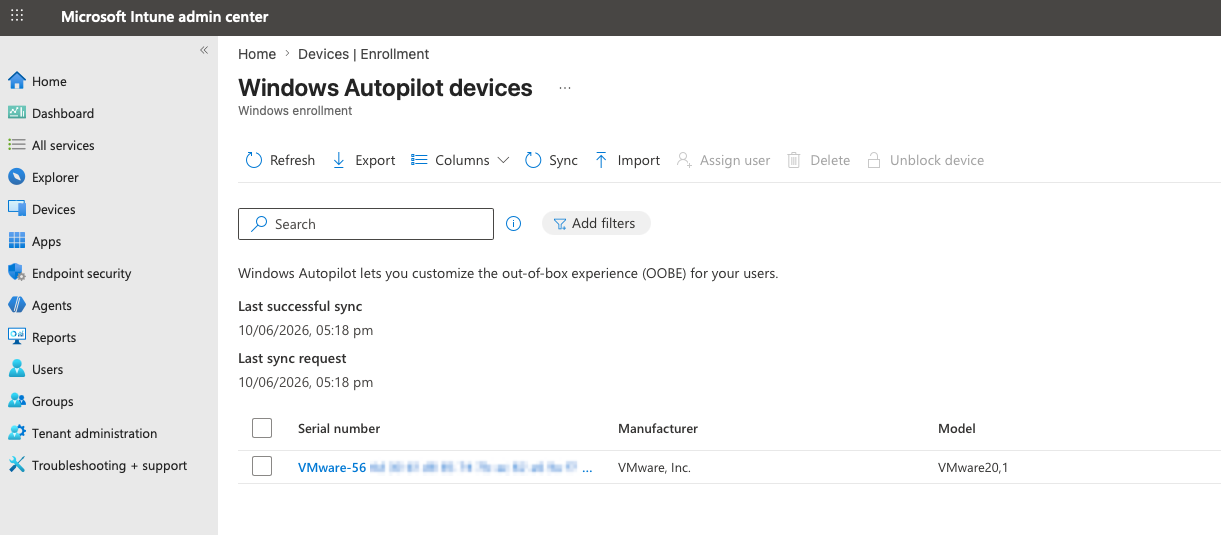
Note: If you need to onboard existing devices that were not registered with Windows Autopilot during procurement, Microsoft provides a script to extract the device hardware hash and import the devices into Autopilot. The process is documented here.
4. Workspace ONE considerations
There are a few additional Workspace ONE settings worth reviewing to optimise the Autopilot onboarding experience.
4.1 Intelligent Hub Deployment
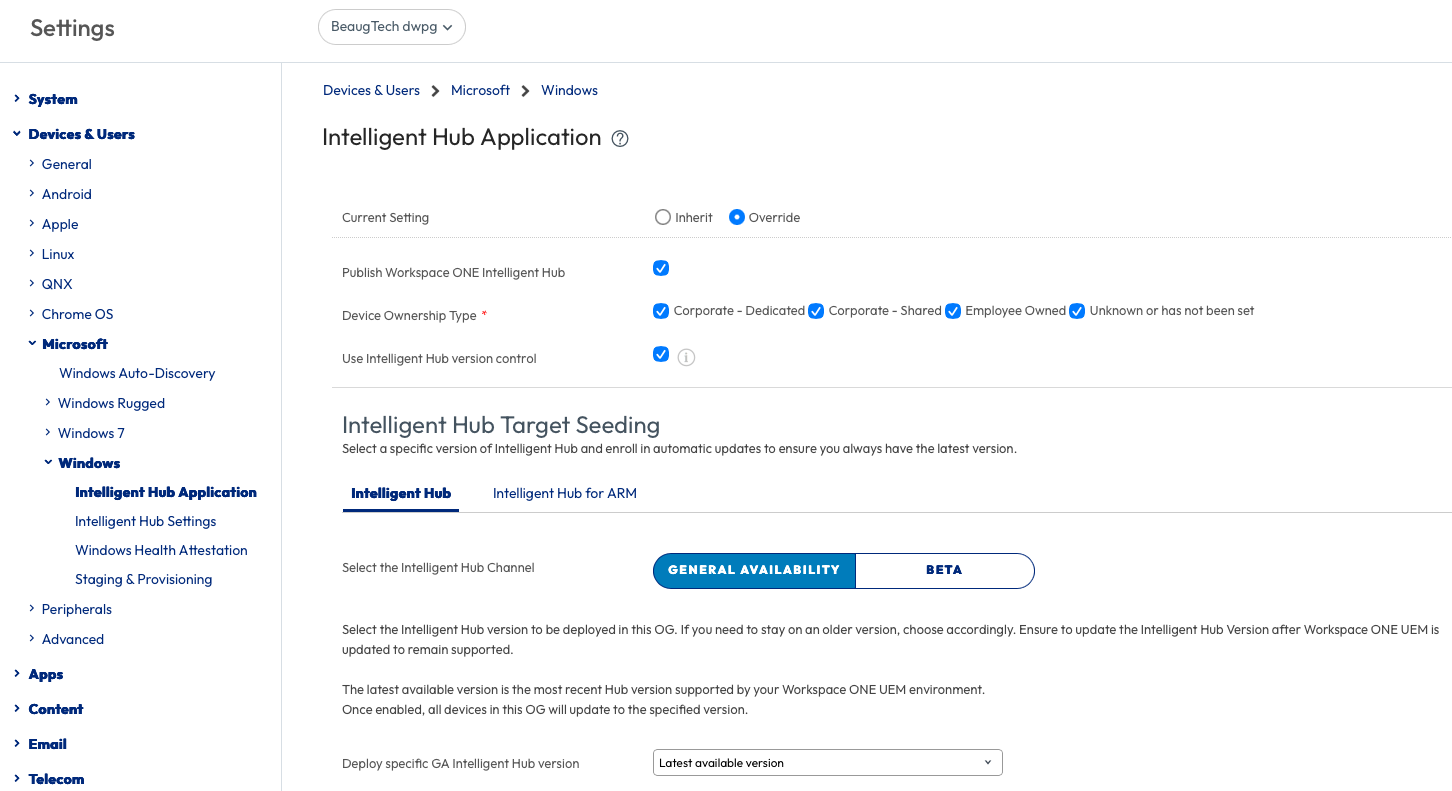
Ensure that Workspace ONE Intelligent Hub is automatically deployed during enrolment.
- Log in to your Workspace ONE UEM tenant
- Navigate to Settings > All Settings > Devices & Users > Microsoft > Windows > Intelligent Hub Application
4.2 Status Tracking Page
To provide users with better visibility during onboarding, I recommend enabling the Workspace ONE Status Tracking page during Out-of-Box Experience (OOBE).
- Log in to your Workspace ONE UEM tenant
- Navigate to Settings > All Settings > Devices & Users > General > Enrollment > Optional Prompt
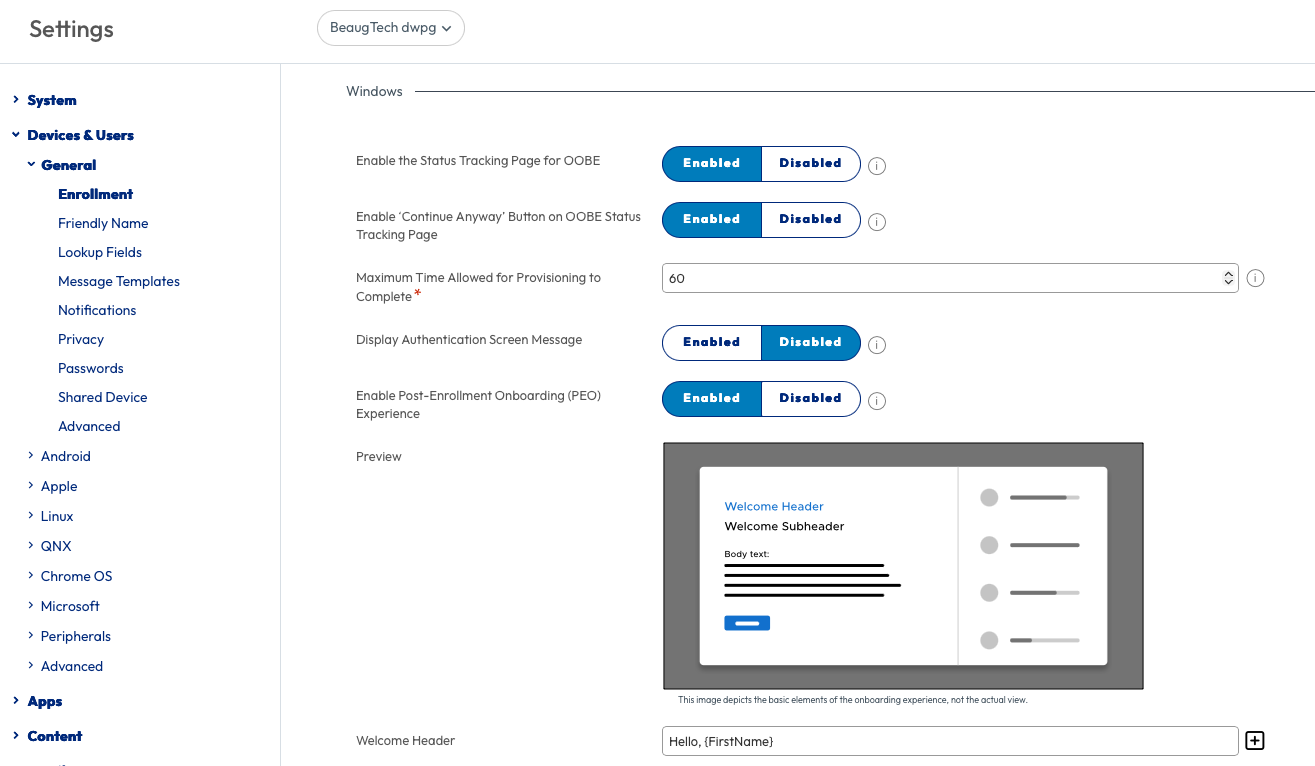
This provides users with a clear view of application installations, profile deployments, and configuration progress during device provisioning.