Enhance your Google Chrome security with Chrome Enterprise

A practical guide to configuring Google Chrome Enterprise using the Google Admin Console, whether devices are managed or unmanaged
Today, the majority of enterprise applications are accessed through a web browser rather than a thick client. As a result, the browser has effectively become the new endpoint, making browser security more critical than ever.
In parallel, we’ve seen a growing adoption of Enterprise Browsers, driven by the need for improved visibility, control, and data protection, especially in hybrid and BYOD environments.
In this article, I’ll walk through how to configure Google Chrome Enterprise, the most widely used browser globally, to provide enterprise-grade security and management. Importantly, this approach works regardless of whether the device itself is corporate managed or personally owned.
The good news is that you don’t need to be a full Google Workspace customer to get started. Chrome Enterprise Core is completely free and provides strong foundational controls. For organisations requiring advanced security features such as malware scanning, Data Loss Prevention (DLP), and real-time URL protection, Chrome Enterprise Premium is available as an upgrade.
You can compare Chrome Enterprise Core and Premium features on Google’s official comparison page: https://chromeenterprise.google/intl/en_au/products/chrome-enterprise-premium/
1. Google Admin Console
1.1 Registration
If your organisation already uses Google services, access to the Google Admin Console likely already exists. In that case, contact your Google Workspace Super Admin to request access.
If your organisation is new to Google services, you’ll need to create a new Google Admin account.
It’s strongly recommended to use a shared mailbox or alias (ie. google.admin@yourdomain.com) rather than an individual account.
To register, visit the Chrome Enterprise sign-up page: https://enterprise.google.com/signup/chromeos/email?origin=ceutrial
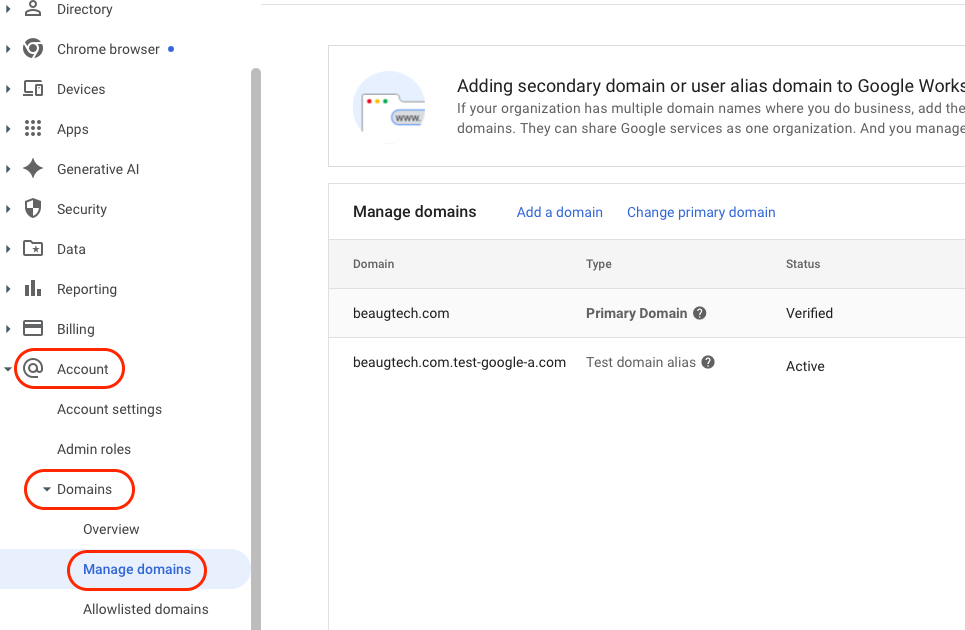
1.2 Domain verification
Domain verification ensures no one else can register services using your organisation’s domain.
- Login to your Google Admin Console
- Go to Account > Domains > Manage Domains
- Click Verify domain
- Copy the TXT record provided
- Open a new browser tab and login to your domain registrar
- Add a new TXT record with the value copied earlier
- Go back to your Google Admin Console tab and click Confirm
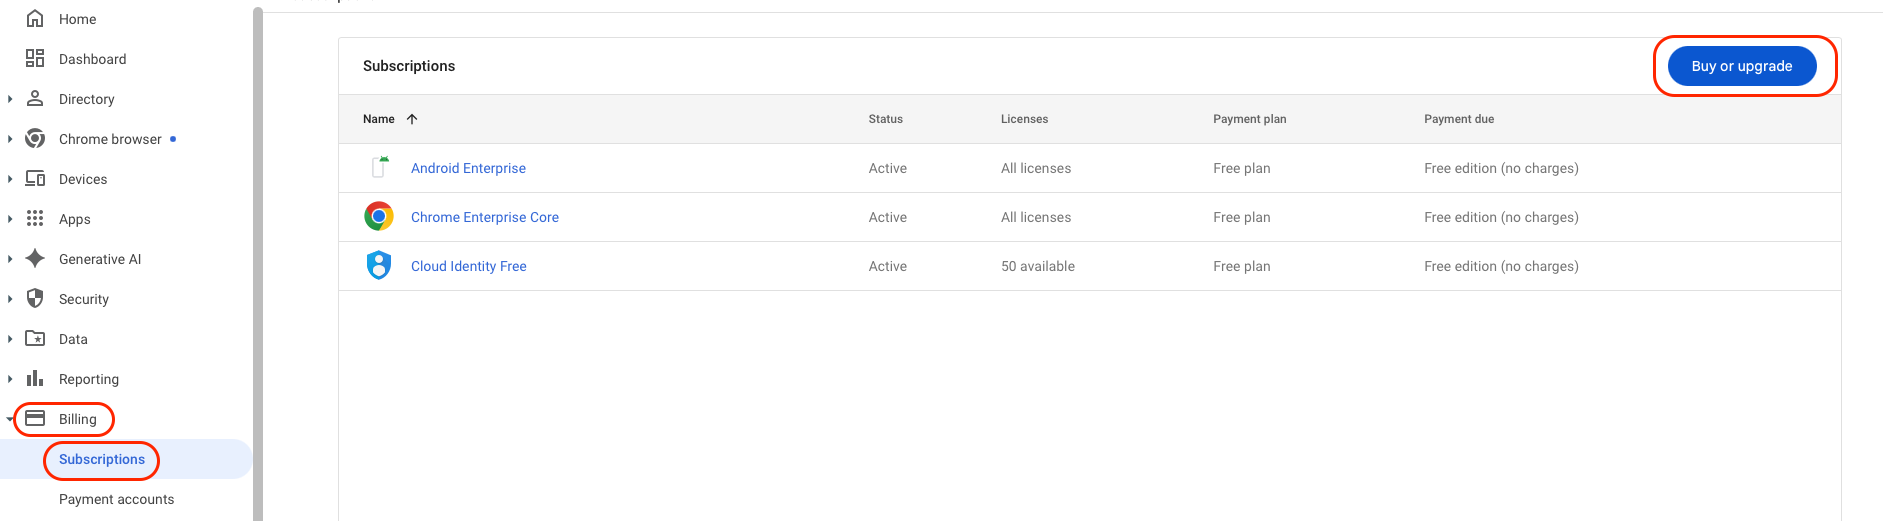
1.3 Licenses
To unlock Chrome Enterprise features:
- Go to Billing > Subscriptions
- Select Buy or upgrade
At a minimum, add:
- Chrome Enterprise Core (Free)
- Cloud Identity Free
For advanced security capabilities, add:
- Chrome Enterprise Upgrade (Paid)
Some vendors bundle Chrome Enterprise Premium into their offerings. For example, Omnissa Secure Access Suite includes Chrome Enterprise Premium as part of the solution, so reach out to your Omnissa representative if you prefer to procure it that way. Buying the Omnissa Secure Access Suite instead of Chrome Enterprise Premium alone delivers secure browser access as part of a full, identity-driven Digital Workspace, including Hub Experience & Unified AppCatalog, modern VPN via Workspace ONE Tunnel, conditional access through Omnissa Access, and robust BYOD support. It also lays the foundation for an Autonomous Workspace journey, unifying security, access, and user experience under a single intelligent platform.
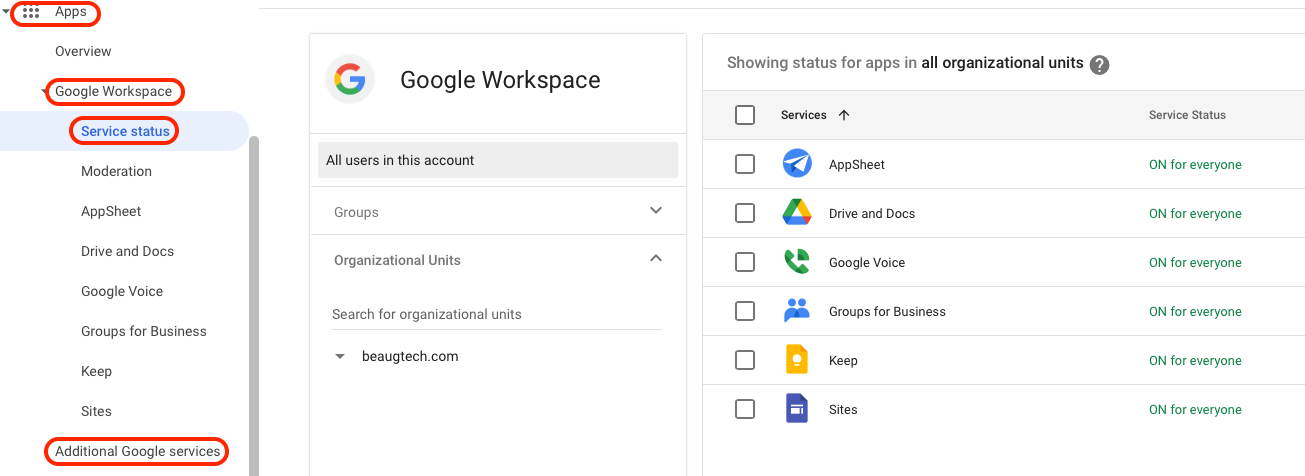
1.4 Services review
Before synchronising users, assess and restrict Google services to align with your security and governance requirements.
Navigate to:
- Apps > Google Workspace > Service status, and
- Apps > Additional Google services
Disable unnecessary services to reduce exposure and complexity.
2. User synchronisation
Google Workspace supports several ways to synchronise users, and the right approach depends on your identity provider. In this case, I’ll use SCIM provisioning from Entra ID to Google Workspace via the native integration in the Google Admin Console.
Note: At the time of writing, this integration is in beta. Alternatively, you can use the Google Cloud / G Suite Connector by Microsoft app from the Entra ID app gallery.
2.1 SCIM configuration
- Login to your Google Admin Console
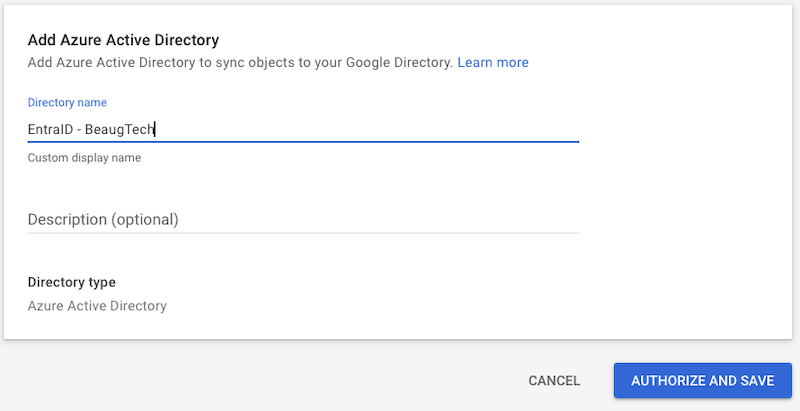
- Go to Directory > Directory sync
- Click Add Azure Active Directory
- Give it a name then click Authorise and Save
- You will get redirected to Entra ID for authentication
- Note that you will require to authenticate with a Global Admin account in order to authorise the integration
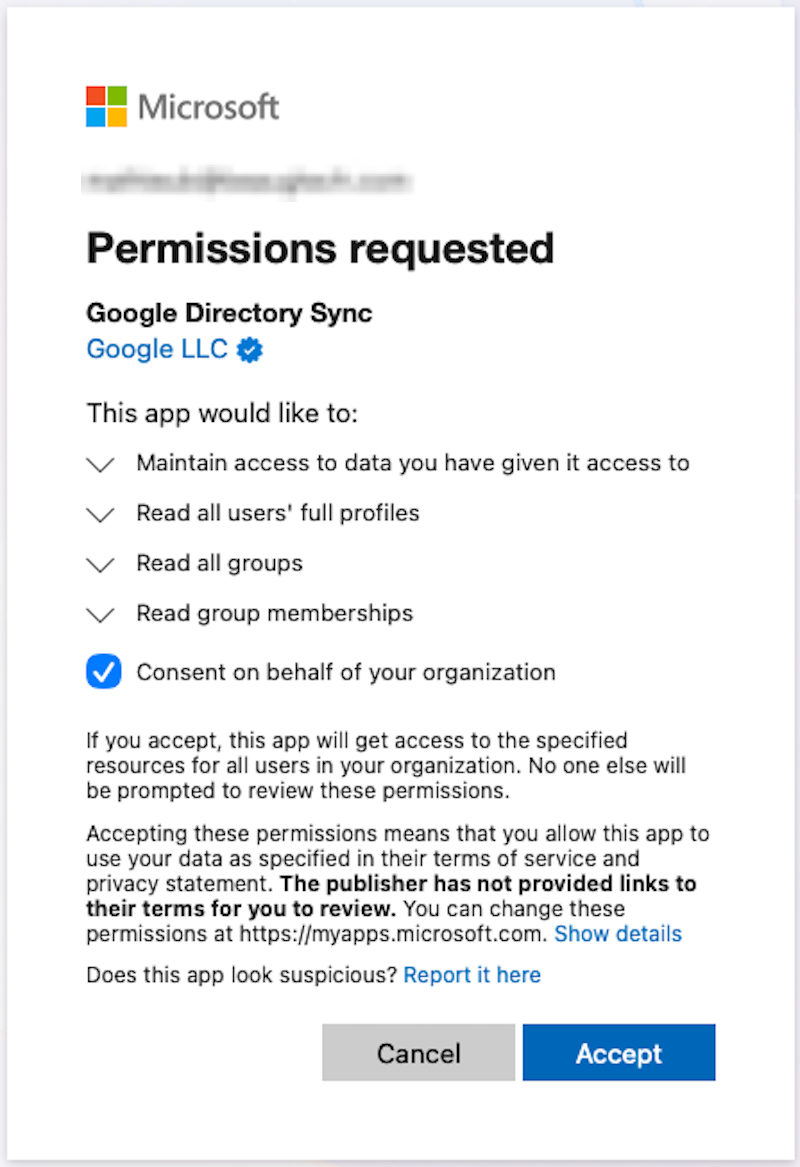
- Accept the Google Directory Sync app creation in Entra ID
2.2 User sync
- Under the User sync section, click Set up user sync
- User Scope
- Use a user based Entra ID security group
- Nested groups do not seem to work in this scenario
- Copy the name of your Entra ID group and paste it into the field
- Click Verify
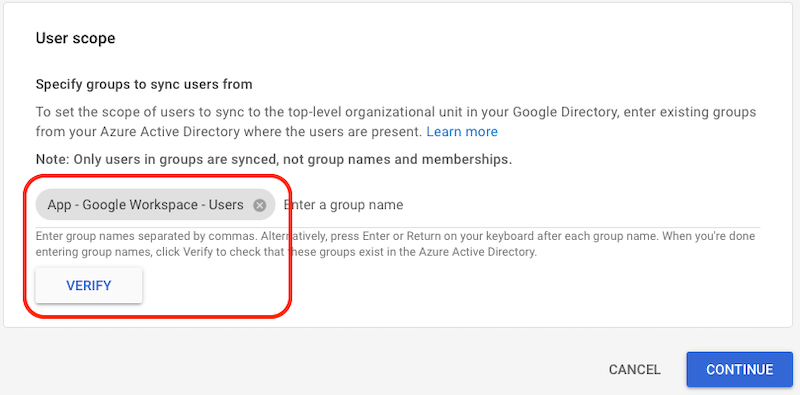
- Use a user based Entra ID security group
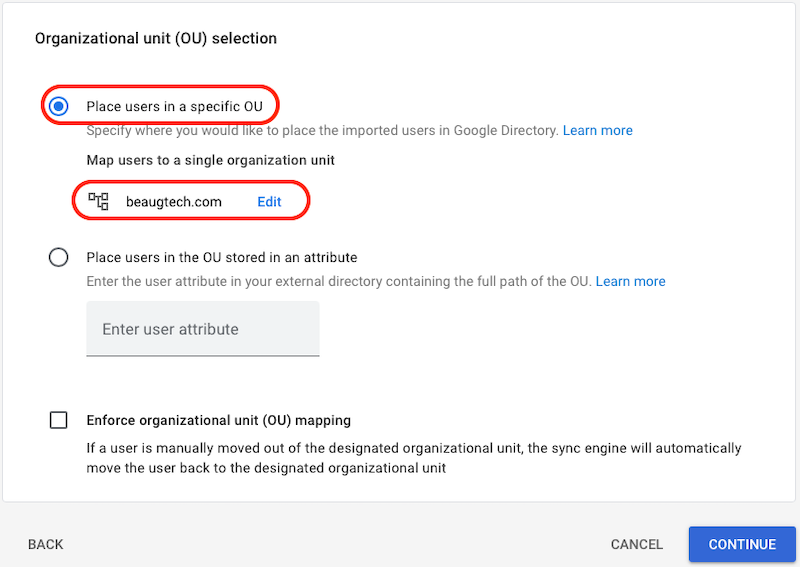
- Organizational unit (OU) selection
- Select Place users in a specific OU
- Click on Select organizational unit
- Then select the top level OU of your domain
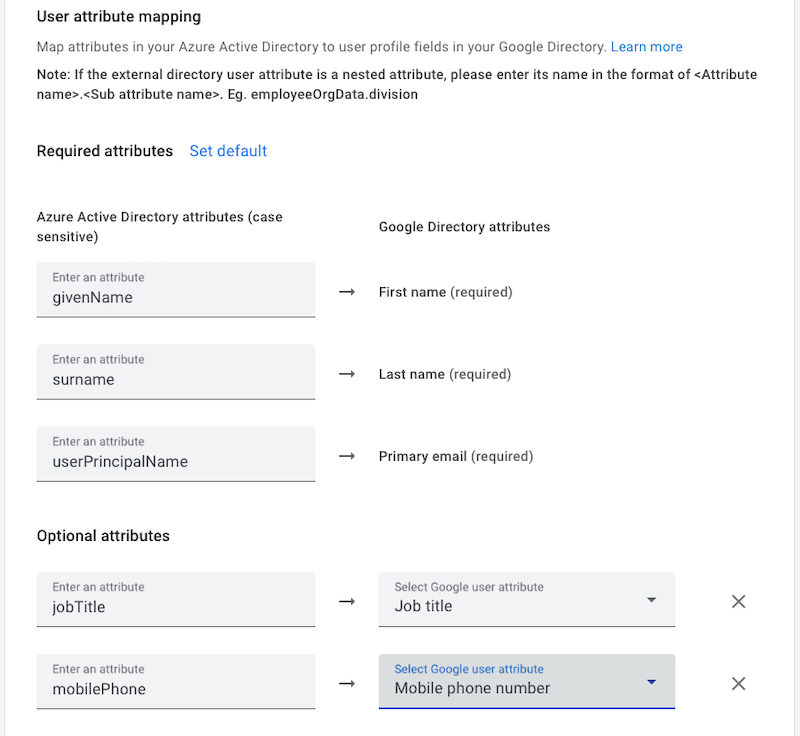
- User attribute mapping
- Map the user attributes as per your requirements
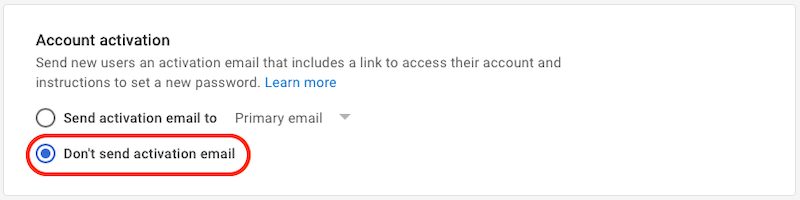
- Account activation
- Select Don’t send activation email
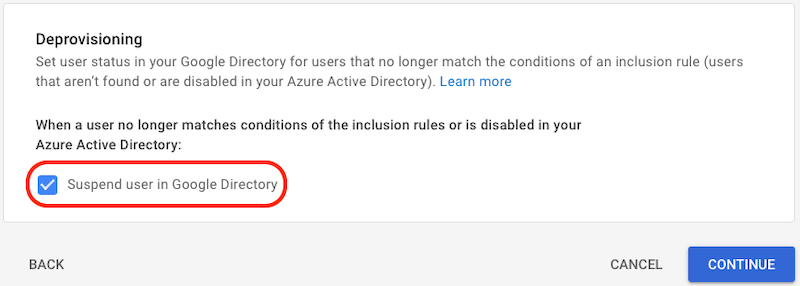
- Deprovisioning
- Click Suspend user in Google Directory
- Safeguards
- Set the safeguard as per your requirements

- User Scope
2.3 Group sync
- Under the Group sync section, click Set up group sync
- Synchronising groups will allow you to assign different Chrome policies based on user groups (ie. Executives vs Staff)
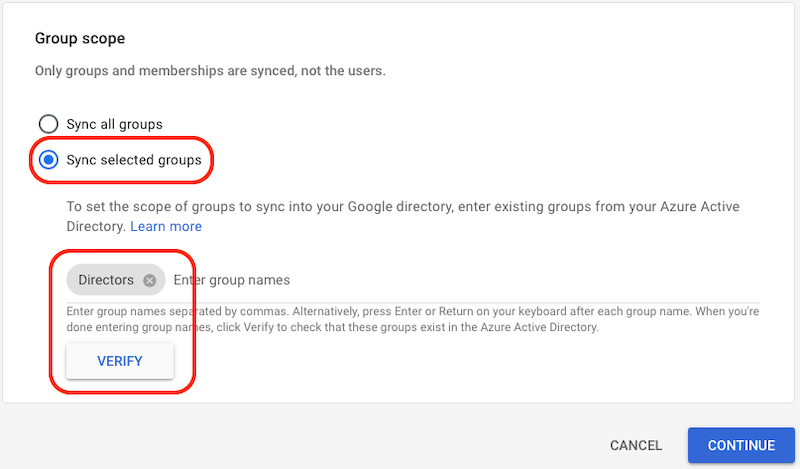
- Group scope
- Select Sync selected groups
- Copy the name of your Entra ID group and paste it into the field
- Click Verify
- Note that for a group to sync, the group must be a mail-enabled security group (see required group attributes below)
- Required attributes
- Leave the default values

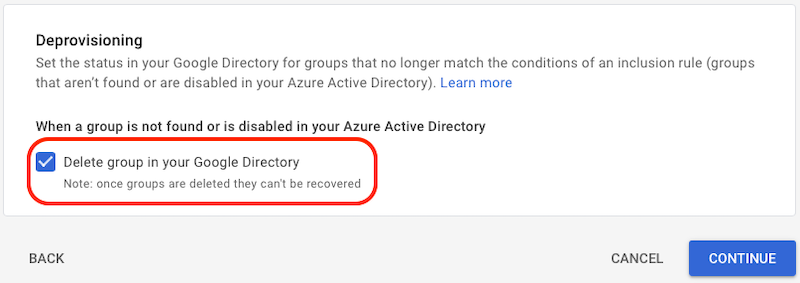
- Deprovisioning
- Click Delete group in your Google Directory
- Safeguards
- Set the safeguard as per your requirements

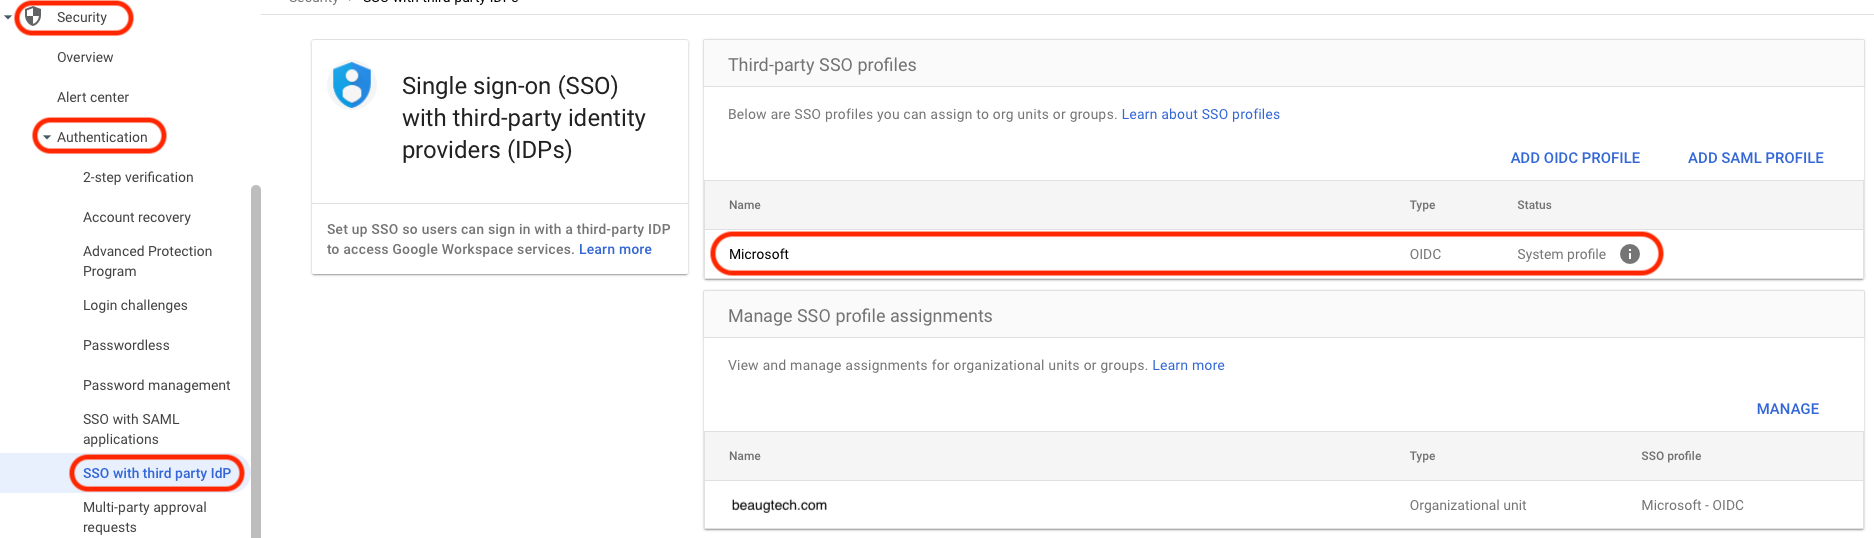
3. Single Sign-On (SSO) and federation
Now that Google accounts are in place, the next consideration is user authentication. Fortunately, Google Workspace supports federation with most Identity Providers (IdP) using SAML or OIDC, allowing users to sign in using SSO rather than remembering another password. If you’re using Microsoft Entra ID as your primary IdP, this is even easier, as Google Workspace is natively federated with Entra ID via the pre-built OIDC profile.
If using another IdP:
- Navigate to Security > Authentication > SSO with third-party IdP
- Create an SSO profile
- Assign it to an OU or user group
4. Google Chrome configuration
4.1 Chrome Enterprise Core
Now let’s look at the foundation of your Chrome configuration.
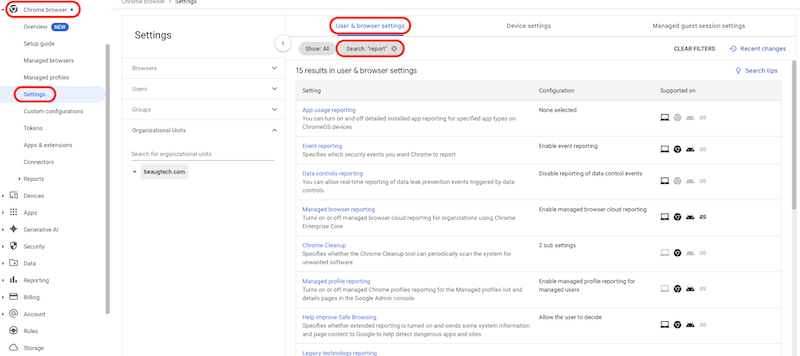
4.1.1 Reporting
- Go to Chrome browsers > Settings
- Select your top OU
- Under the User & browser settings tab search for
report - Configure the following reporting policies:
- Managed browser reporting: Enable managed browser cloud reporting
- Event reporting: Enable event reporting
- Managed profile reporting: Enable managed profile reporting for managed users
- Managed browser reporting upload frequency: 4 hours
- Device token management: Delete token
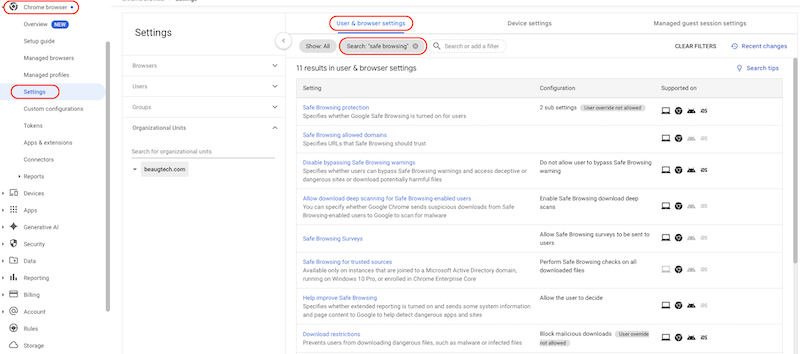
4.1.2 Safe browsing
- Under the User & browser settings tab search for
safe browsing - Configure the following Safe Browsing policies:
- Safe Browsing protection: Set the “Safe Browsing Protection Level” configuration to enhanced mode
- Disable bypassing Safe Browsing warnings: Do not allow users to bypass Safe Browsing warning
- Allow download deep scanning for Safe Browsing-enabled users: Enable Safe Browsing download deep scans
- Download restrictions: Block malicious downloads
4.1.3 Third party device trust connector (optional)
If your Identity Provider (IdP) supports device trust signals, integrating Google Chrome Enterprise enables context-aware access decisions based on browser trust. Chrome provides device signals such as managed browser status and disk encryption posture, allowing your IdP to enforce conditional access policies accordingly.
Note: The Chrome Enterprise Device Trust integration enables security posture verification for ChromeOS, Windows, and macOS devices.
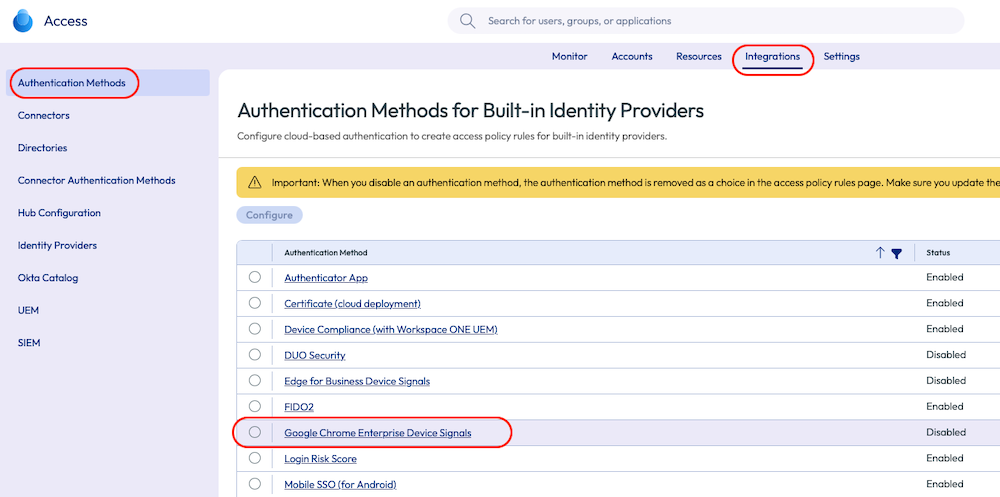
In this example, I’ll walk through the integration using Omnissa Access as the IdP. Google Chrome Enterprise also supports integrations with other identity providers that offer device trust capabilities.
- Login to your Omnissa Access tenant
- Go to Integrations > Authentication Methods
- Click on Google Chrome Enterprise Device Signals adapter
- Enable the authentication method
- Copy the URLs matcher & IDP service account
- You will need those details later on in the Google Admin console
- Configure the device signals as per your requirements
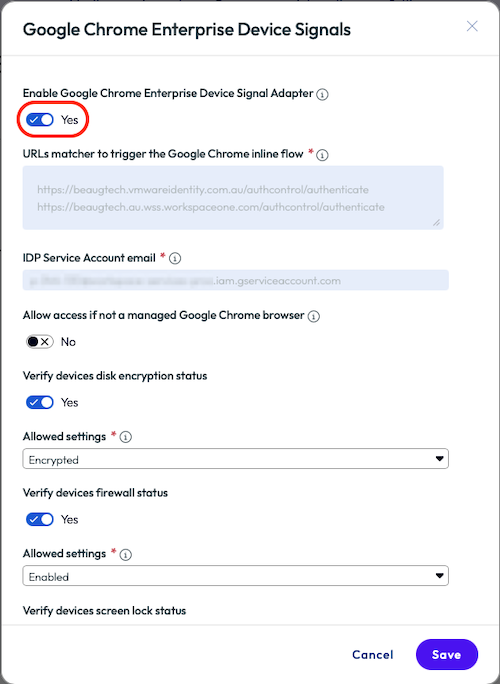
Note: Device signals that can be collected via Managed browser or Managed profile include:
- Disk Encryption: This signal checks whether the device's hard drive or SSD is encrypted. Only devices with an active main disk encryption will be granted access.
- Firewall Status: This signal checks whether the device firewall is enabled. Devices will not be granted access if their firewall is in a disabled state.
- Screen Lock Secured: This signal checks whether the device's screen lock is secured. Only devices with an enabled screen lock will be granted access.
Configure the device trust connector in the Google Admin console:
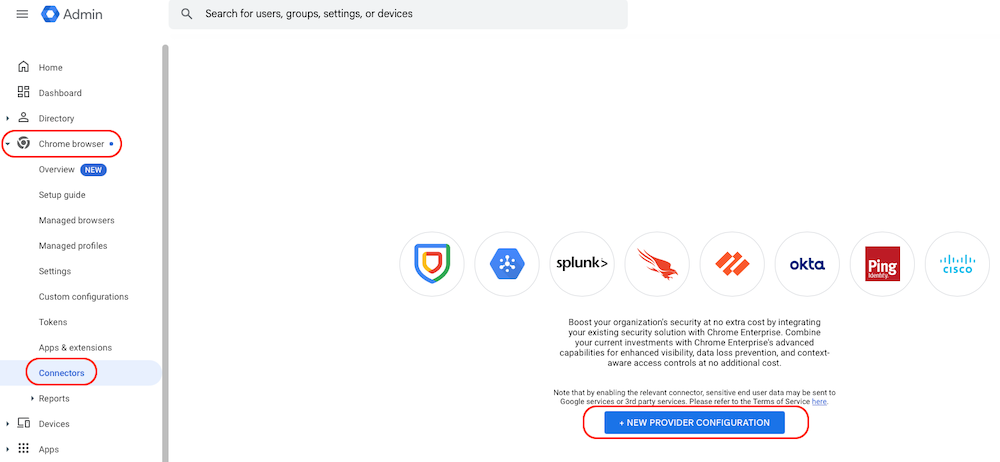
- Login to your Google Admin Console
- Go to Chrome browser > Connectors
- Click + New provider configuration
- Find your IdP, then click Set up
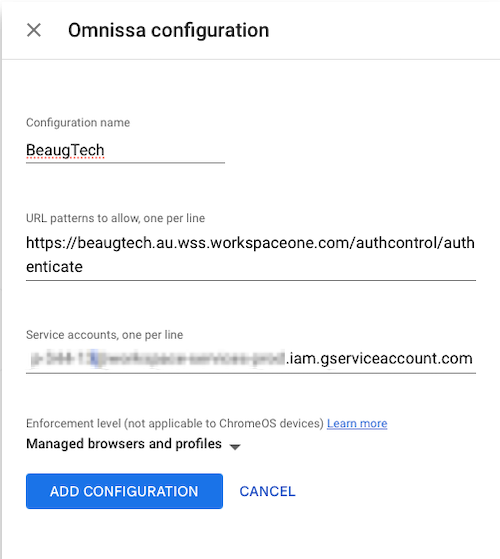
- Paste the URLs matcher and service account details copied from Omnissa Access
- Click Add configuration
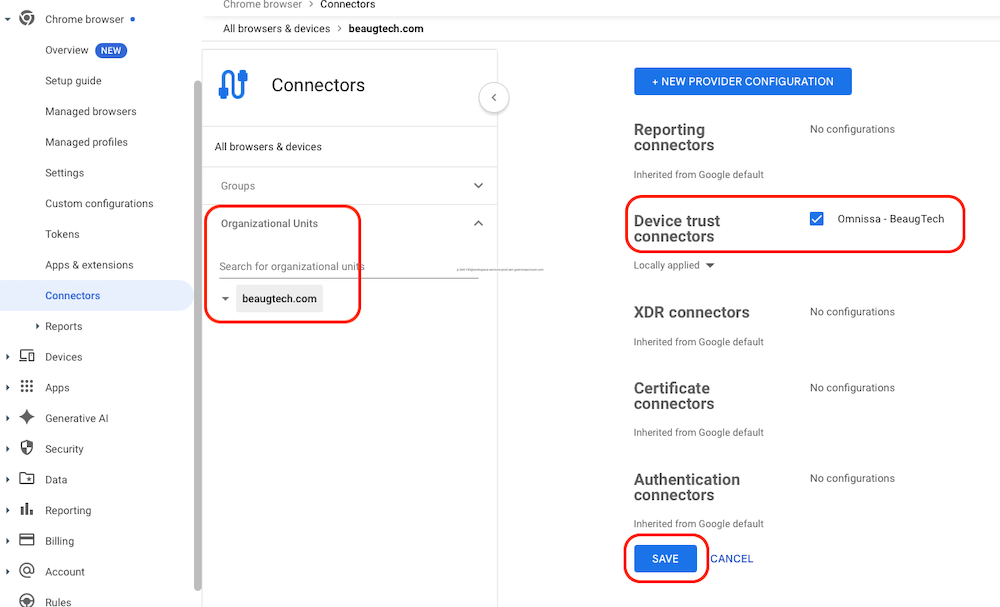
- Assign the connector configuration to the appropriate OU
Configure your conditional access policy:
- Login to your Omnissa Access tenant
- Go to Resources > Policies
- Create a new policy or edit an existing one
- Configure the policy based on your access requirements
- Device type: Windows 10+ or macOS or Chrome OS
- Add Google Chrome Enterprise Device Signals as a second authentication method

With this configuration in place, Chrome will continuously send device trust signals to Omnissa Access during authentication. These signals can then be evaluated in real time to enforce access controls.
For example, you could:
- Allow access to your CRM or SaaS applications only from managed Chrome browsers (managed browser & managed profile)
- Block access from unmanaged browsers, even if the user credentials are valid
- Combine browser trust with other signals such as user, network, or risk level
4.2 Chrome extensions
Managing browser extensions effectively is essential to maintaining a secure browser environment, as extensions can introduce significant security and data exposure risks if left unmanaged.
- Go to Chrome browsers > Apps & extensions
- Under the Users & browsers tab
- Select the appropriate OU or Group for assignment
- Add and configure the Chrome extensions as per your requirements, for example:
- Endpoint Verification extension
- Click the “+” icon and select Add Chrome app or extension by ID
- Extension ID: callobklhcbilhphinckomhgkigmfocg
- Installation policy: Force install + pin to browser toolbar
- Secure Enterprise Browser extension:
- Click the “+” icon and select Add Chrome app or extension by ID
- Extension ID: ekajlcmdfcigmdbphhifahdfjbkciflj
- Installation policy: Force install + pin to browser toolbar
- Endpoint Verification extension
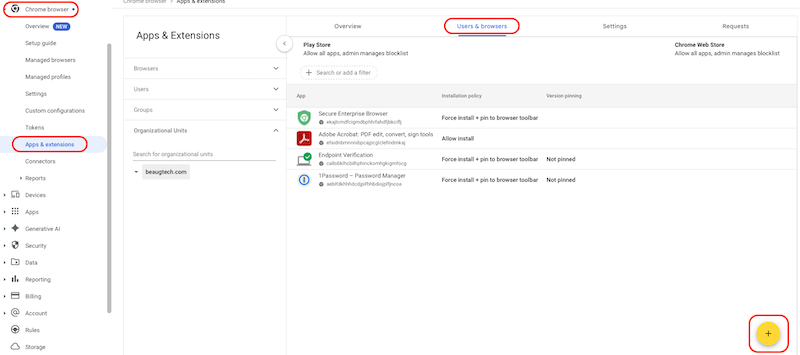
Once you have visibility into which extensions are being used across your environment, you can make an informed decision on how to manage them moving forward—typically by enforcing either an allowlist or blocklist using the settings below.
- Go to Chrome browsers > Apps & extensions
- Under the Settings tab
- Select the appropriate OU or Group for assignment
- Click on the Allow/block mode policy
- Play store: Block all apps, admin manages allowlist
- Chrome Web Store: Block all apps, admin manages allowlist, users may request extensions
4.3 Chrome Enterprise Premium
Chrome Enterprise Premium provides a wide range of advanced configuration capabilities. In this section, I’ll focus on establishing a small set of foundational policies, but you’re encouraged to explore the 500+ additional policies available to further tailor the solution to your requirements.
- Go to Chrome browsers > Settings
- Select the appropriate OU or Group for assignment
- Under the User & browser settings tab search for
connector - Configure content connector and URL check policies:
- Upload content analysis: Chrome Enterprise Premium
- Additional settings
- Delay file upload: Delay the transfer until the analysis is complete
- Block file transfer on failure: Enabled
- Check for sensitive data: On by default, except for the following locations
- User justifications to bypass: Enable
- Check for malware: On by default, except for the following locations
- User justifications to bypass: Disable
- Password protected files: Allow
- Files larger than 50MB: Allow
- Delay file upload: Delay the transfer until the analysis is complete
Repeat the above process for the following connector policies:
- Download content analysis
- Bulk text content analysis
- Minimum character count: 30
- Print content analysis
- Real time URL check
Enable advanced data protection features:
- Go to Security > Access and data control > Data protection
- Under the Data protection settings section
- Data insights scanning and report: On
5. Deployment models
Chrome supports two management modes:
| Managed browser | Managed profile |
|---|---|
| Device-level management | User-based management |
| Ideal for corporate managed devices | Ideal for unmanaged devices and contractors |
| Policies apply even without user sign-in | Activated when the user signs in to Chrome |
More information: https://support.google.com/chrome/a/answer/15591684
5.1 Managed browser
5.1.1 Enrolment token
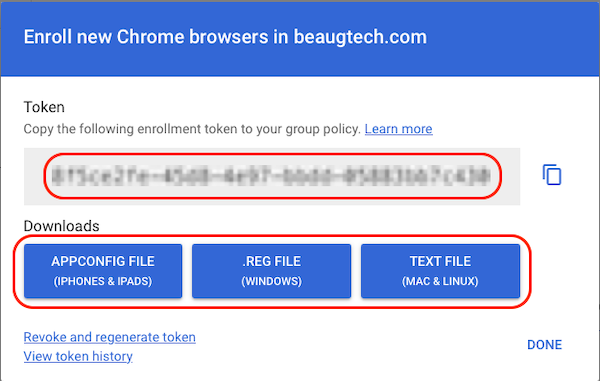
To configure the managed browser option, you need to download the configuration file from your Google Admin Console.
- Go to Chrome browsers > Managed browsers
- Select the devices OU
- Click Enroll
- Copy and/or download your token
5.1.2 Windows deployment
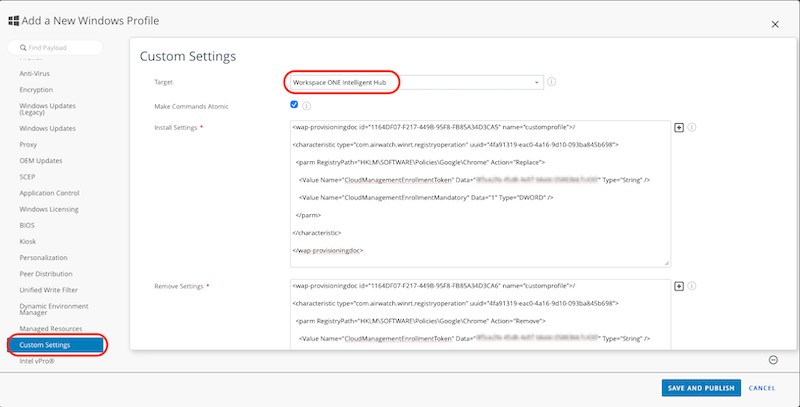
Deploy the enrolment token using your PCLM/UEM solution. In this instance I am leveraging Workspace ONE to deploy the configuration file.
- Login to your Workspace ONE console
- Go to Resources > Profiles
- Click ADD then Add Profile
- Select Windows then Device Profile
- Select the Custom Settings payload
- Target: Workspace ONE Intelligent Hub
-
Install Settings:
<wap-provisioningdoc id="1164DF07-F217-449B-95F8-FB85A34D3CA5" name="customprofile">/ <characteristic type="com.airwatch.winrt.registryoperation" uuid="4fa91319-eac0-4a16-9d10-093ba845b698"> <parm RegistryPath="HKLM\SOFTWARE\Policies\Google\Chrome" Action="Replace"> <Value Name="CloudManagementEnrollmentToken" Data="XXXXXXXX-XXXX-XXXX-XXXX-XXXXXXXXXXXX" Type="String" /> <Value Name="CloudManagementEnrollmentMandatory" Data="1" Type="DWORD" /> </parm> </characteristic> </wap-provisioningdoc> -
Remove Settings:
<wap-provisioningdoc id="1164DF07-F217-449B-95F8-FB85A34D3CA6" name="customprofile">/ <characteristic type="com.airwatch.winrt.registryoperation" uuid="4fa91319-eac0-4a16-9d10-093ba845b698"> <parm RegistryPath="HKLM\SOFTWARE\Policies\Google\Chrome" Action="Remove"> <Value Name="CloudManagementEnrollmentToken" Data="XXXXXXXX-XXXX-XXXX-XXXX-XXXXXXXXXXXX" Type="String" /> <Value Name="CloudManagementEnrollmentMandatory" Data="1" Type="DWORD"/> </parm> </characteristic> </wap-provisioningdoc> - Save and Publish
- Custom settings details are documented here
5.2 Managed profile
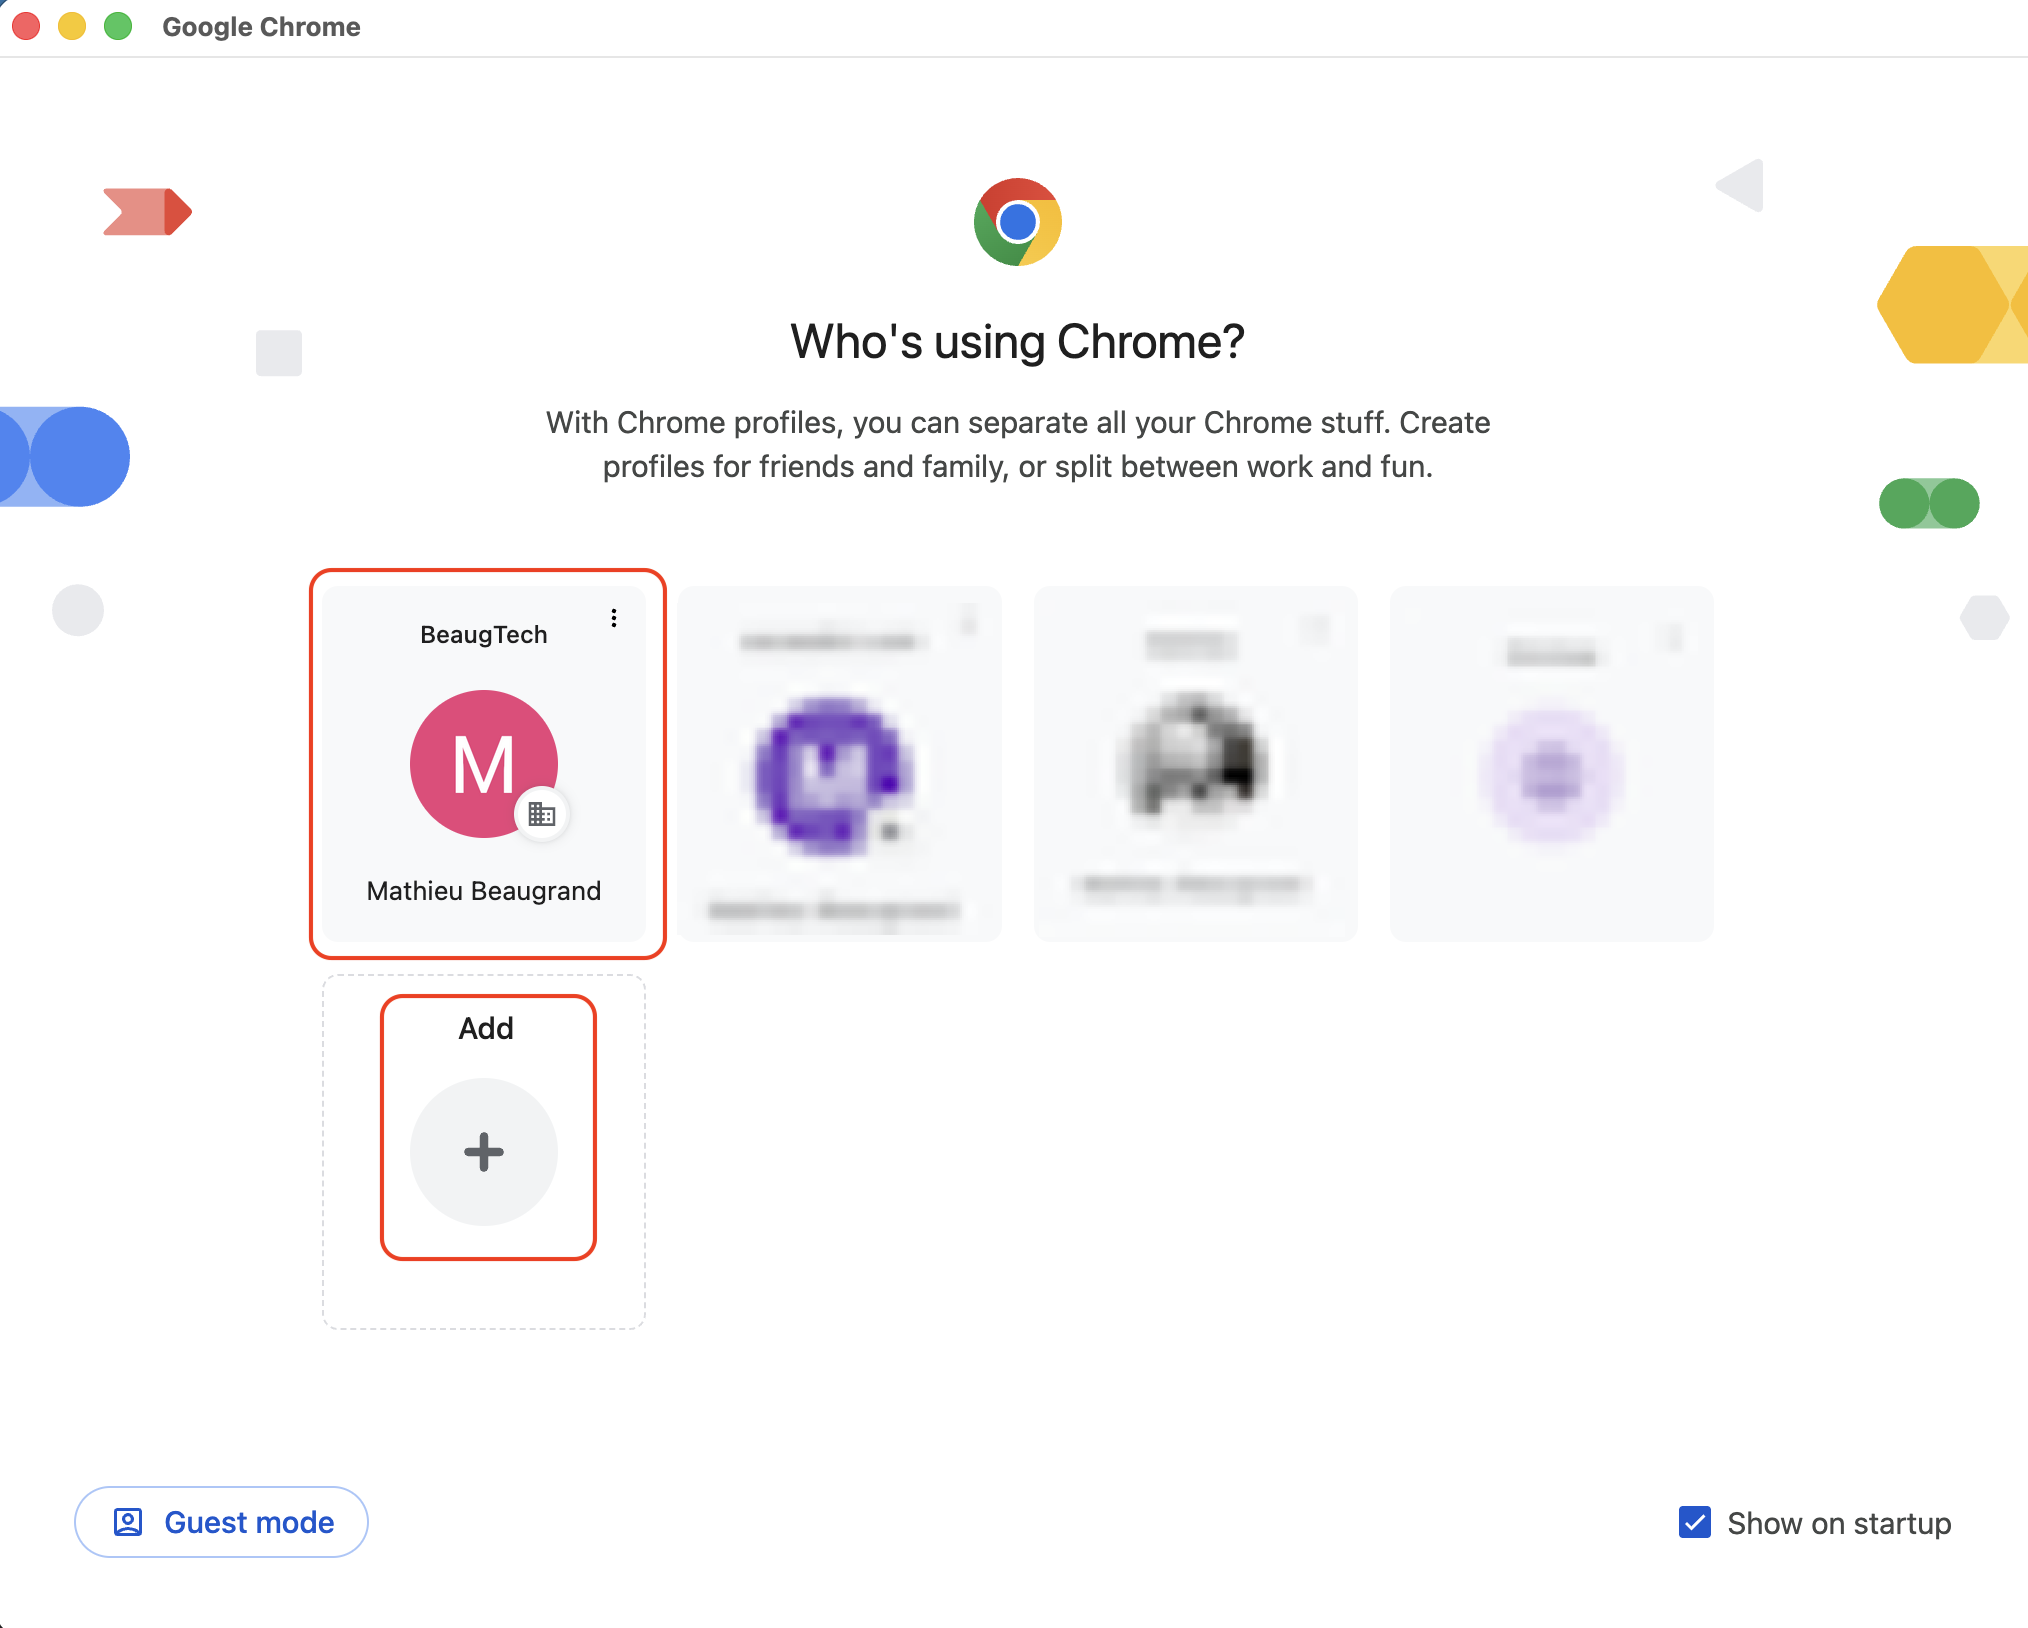
No additional configuration is required for Chrome managed profiles, as management is automatically enabled when users create a Chrome profile and sign in with their managed Google account. Users simply need to:
- Create a Chrome profile
- Sign in with their managed Google account
5.3 Confirm enrolment
On your test device, restart the Chrome browser to trigger synchronisation. You can confirm successful enrolment in the Google Admin Console under Chrome browsers > Managed browsers and/or Chrome browsers > Managed profiles. To verify that policies are applied on the device, open a new Chrome tab and navigate to chrome://policy.
6. User experience
7. Additional resources
- Chrome Enterprise training: https://edu.exceedlms.com/student/collection/1771555